How to Properly Install Metal Ball Valve

Installation & Precautions

The correct installation of metal ball valves is crucial, not only affecting the performance and service life of the valve itself, but also directly impacting the safety, stability and economic efficiency of the entire system. Following the standardized installation steps and precautions can maximize the superior performance of the ball valve and ensure the efficient operation and long-term reliability of the fluid control system.

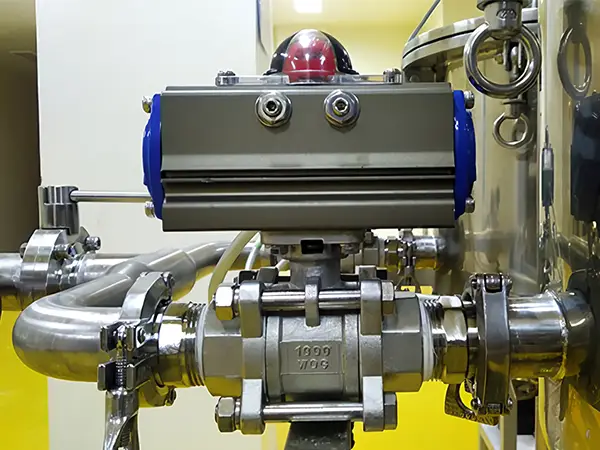
Installed metal ball valve

Installation Steps

  1. Preparation before installation

    • Ensure that the installation position of the ball valve is on the same axis. The two flanges on the pipeline should be kept parallel. Confirm that the pipeline can bear the weight of the ball valve. If it is found that the pipeline cannot bear the weight of the ball valve, equip the pipeline with corresponding support before installation.
    • Purge the pipeline before and after the valve to remove the oil, welding slag and all other impurities in the pipeline
    • Check the nameplate of the ball valve, and perform full open and closed operations on the ball valve several times to confirm that the valve can work normally, and then check all the details of the valve thoroughly to ensure that the valve is intact.
    • Remove the protective covers at both ends of the valve, check whether the valve body is clean, and clean the inner cavity of the valve body. Since the sealing surface of the ball valve is spherical, even tiny debris may cause damage to the sealing surface.
  2. Start to install the ball valve

    • Install the valve on the pipeline. Either end of the valve can be installed on the upstream end. The handle-actuated valve can be installed anywhere on the pipeline. However, ball valves with gearboxes or pneumatic drives should be installed upright, i.e. on a horizontal pipe with the drive above the pipe.
    • A gasket shall be installed between the valve flange and the pipeline flange according to the pipeline design requirements.
    • The bolts on the flange should be tightened symmetrically, sequentially and evenly.
    • If the pneumatic pipeline ball valve adopts pneumatic or electric actuators, complete the installation of the air source and power supply according to the instructions.
  3. Inspection of ball valve after installation

    • Operate the driver to open and close the ball valve several times, and it should be flexible and not stagnant, confirming that it works normally.
    • Check the sealing performance of the flange joint surface between the pipeline and the ball valve according to the pipeline design requirements.

The above are the operating steps and precautions before, during and after the installation of the ball valve. You can use it as a reference to meet your ball valve installation needs. If you encounter any problems during the installation process, please feel free to contact us, we will do our best to help you solve them.