


Step 1
Get all parts and components well prepared.

Water distributor installation is not hard, but if you get the right steps and take good consideration of precautions, you will install faster and more efficient.
When installing a water distributor, it generally connects to FRP tanks through thread or flange. Here we'd like to introduce water distributor installation in FRP tanks with thread connection.
Side-Mounted Water Distributor Installation
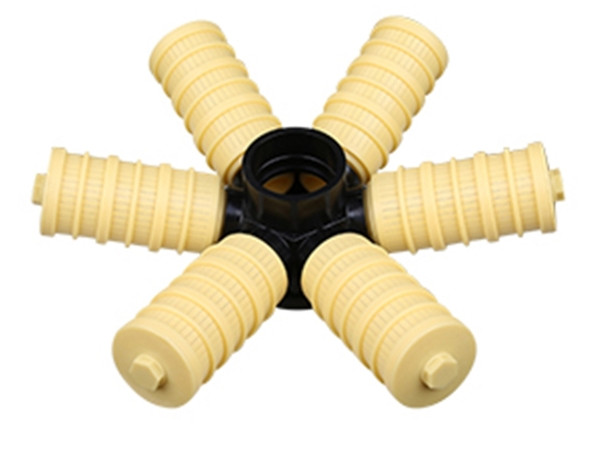
Let's take 6-claw lower distributor as an example.
Get all parts and components well prepared.

Put the adaptor, mushroom head and water distributor tubes into the FRP tank and then tighten the water distributor tubes in the tank.

Tighten the adaptor and mushroom head.
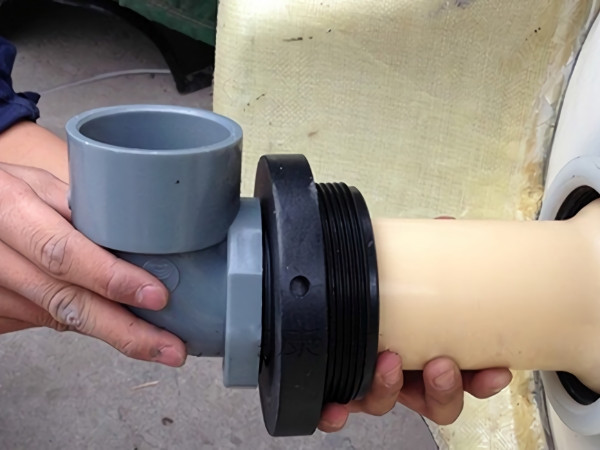
Connect the outer pipe components with the adaptor.
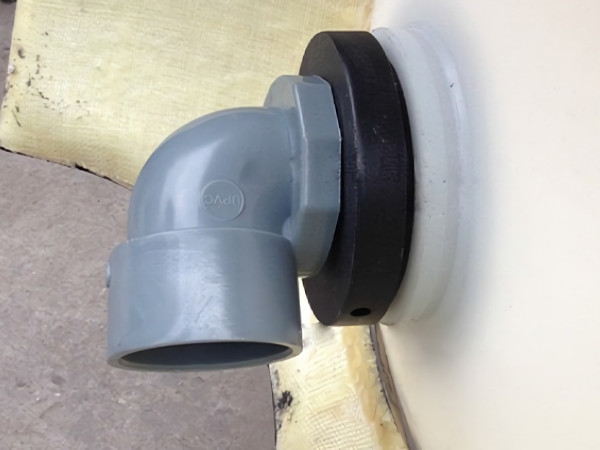
Assemble the outer pipe components and tank port thread.
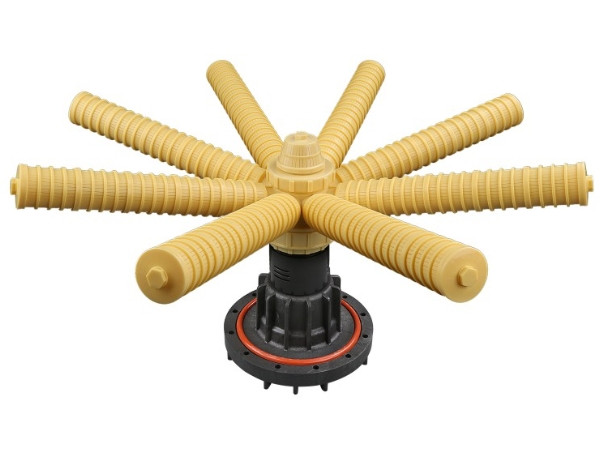
Top-Mounted Water Distributor Installation
Let's take 6-claw lower distributor as an example.
Consider the height of the FRP tank, you may place the tank horizontally onto the ground for easy installation.
When installing a water distributor in the pre-treatment system, probelems existing in equipment selection, pipeline system design, FRP tank assembly and pipe connection shall be taken into consideration.
Equipment Selection
First, determine the valve model, tank diameter, tank height and resin filling amount based on multiport control valve parameters, tank size, upper and lower water distributor configurations, working conditions and process requirements to achieve reasonable layout of FRP tank, multiport control valve and water distributor.
Pipeline System Design
It is suggested to design a Y-type strainer before the multiport control valve to prevent the multiport control valve from foreign matter clogging, protect plunger piston, gratings and seal ring, reduce wear and extend the lifespan of the valve body. The water supply pipe shall be equipped with a slow opening and closing valve and the highest point of the pipe shall be equipped with a siphon break valve to effectively mitigate and even avoid the damage caused by water pressure impact and negative pressure.
Installation Environment
The equipment shall be installed in an environment that is protected from rain, moisture, sun, frost, high temperature and impact with reasonable maintenance space, maintenance channels and drainage facilities.
Tank Assembly
Thread connector. When installing a water distributor, the center tube must be placed vertically to ensure the center tube is always in the middle of the tank port. When installing the multiport control valve, it should be noted that the tank thread and the tank port are in parallel. Align the thread and install it carefully to ensure the thread is well connected. And then tighten the valve body. Apply silicon grease on the o-ring of the tank port.
Flange connector. Check the tank flange port to ensure it is flat and flawless; Assemble the water distributor reasonably and apply silicone grease on the seal ring; Fix the flange bolts and tighten the bolts in diagonal to ensure the torque is uniform.
Pipe Connection

Place the pipe support in a proper position to prevent vibration and impact generated during the pipeline system operation. The pipeline construction must be carried out in accordance with local installation regulations. It is suggested to install water hammer arrestor and negative pressure prevention device to ensure the normal operation of the system.


Hengshui Snowate Environmental Technology Co., Ltd. (Snowate) aims to become a solution-oriented company to promote the sustainable development of water.